Table of contents
- What is the Serverless Framework?
- The Serverless Framework advantages
- Some Serverless Framework relevant terms
- Install serverless
- Create a service
- Enabling Typescript and installing other necessary modules
- Define a JSON schema for validating the body of the request.
- Store secrets remotely and use them in your code for free
- Deploying your serverless functions and other cloud resources
What is the Serverless Framework?
The Serverless Framework is a CLI tool that integrates with your favorite cloud service provider in order to automate the creation of your cloud resources. Serverless works extremely well with serverless functions like AWS Lambda Functions, Google Cloud Functions and Azure Functions, but you are allowed to automatically create and manage any kind of cloud resource, not only serverless functions. You can let Serverless manage your AWS DynamoDB tables, your AWS S3 Buckets, and so on.
Keep in mind that all of the magic behind the Serverless Framework is just infrastructure as code and it's pretty likely that you can also do what the Serverless Framework does with a native service from your cloud service provider like CloudFormation.
The difference between Serverless and those native infrastructure as code services is that serverless is like 100 times easier to understand and handle that things like CloudFormation. CloudFormation is a tool intended to be used by really experienced people.
The Serverless Framework advantages
- Let's you create all of the cloud resources for your application by running a single command
- Let's you keep multiple versions for each resource you deploy with it
- Let's you keep multiple stages or environments for your resources
- If you get hacked and get all of your resources deleted, you can recover them by running a single command
- Don't have to tediously create resources manually on your cloud service provider console
- The documentation is really great and easy to understand
- If you ever wondered how to write your Node.js serverless functions on Typescript, using the Serverless Framework is possibly the only and best way to do it
- Won't generate a bunch of boiler plate code and weird files that no one understands, like AWS Amplify does
- Has more than 1000 plugins that will let you:
- Run your serverless functions and test your api locally before deploying it
- Use your preferred backend framework like Express.js for developing all of your api endpoints
- Automatically and seamlessly generating Open API documentation for your api
- And much more
- You are free to structure your code, files and folders as you like on your preferred code editor
Some Serverless Framework relevant terms
- Organization: Organizations are created on the Serverless Framework dashboard. An organization contains one or more applications. You need to specify the name of the organization on your
serverless.ymlin order to link your deploy with the Serverless Dashboard. - Application: Applications are created on the Serverless Framework dashboard. An application belongs to an organization and an application contains one or more services. You need to specify the name of the application on your
serverless.ymlin order to link your deploy with the Serverless Dashboard. - Service: A service is just a Serverless Framework project section that contains all of the serverless functions code and a
serverless.ymlfile. Services are a great way of organizing your code, most applications have a single service, but if you have a lot of serverless functions it is recommended to split your functions and resource definitions on multiple services. - Stage: A stage is just an environment, a stage is defined when you deploy your cloud resources using the command
serverless deploy --stage <stage-name>. The most common stages across development teams aredev,stagingandproduction.
Linking your deployments with the Serverless Dashboard has a handful of advantages, like enabling observability for your resources and deployments, and being able to pull secrets from your dashboard and use them on your
serverless.ymlfile and your serverless functions code.
Install serverless
Install the serverless node module globally on your system using npm by running npm install -g serverless
Create a service
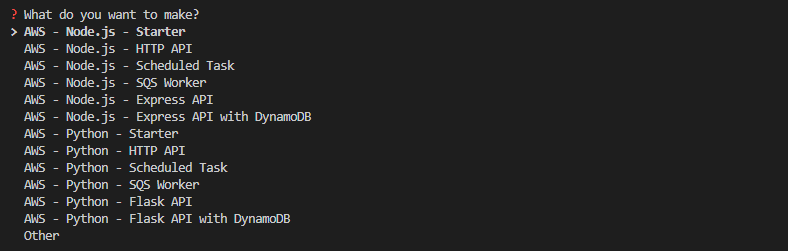
Create a service by running serverless.
After running the command you will be prompted to answer some questions in order to customize your starting template:
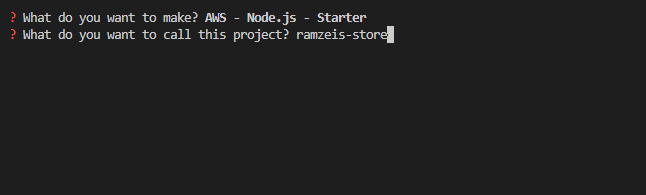
Choose the AWS - Node.js - Starter template.
Choose a service name for your service, let's choose ramzeis-store
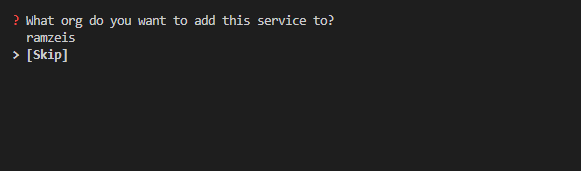
If you are currently logged in with your Serverless Dashboard account it is possible that you will be asked the question on the image below. Select [Skip], here I will teach you how to MANUALLY link your Serverless Dashboard account with your deployments so if someday you get lost, you know how to move forward.
If it is your first time using the Serverless Framework and you're not logged in then the flow will ask you to log in or sign up for a Serverless Dashboard account. If this last one is the case do not sign up neither login.
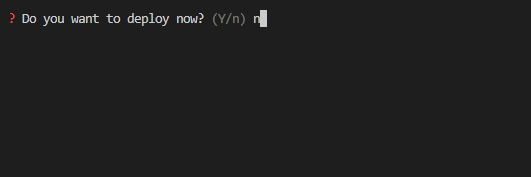
Do not deploy now.
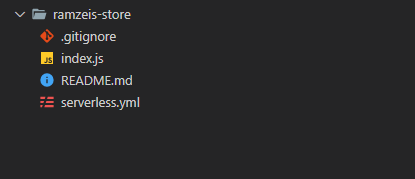
After finishing all of the process you will get a file structure that looks like this:
And the content of your serverless.yml file will look like this:
service: ramzeis-store
frameworkVersion: '3'

provider:
  name: aws
  runtime: nodejs18.x

functions:
  function1:
    handler: index.handler
Keep in mind that the index.js file contains the source code of the only AWS Lambda Function that exists on your service for now. On the serverless.yml file you must always define where are all of your AWS Lambda Functions handlers located.
On the serverless.yml file change the name of your only AWS Lambda Function from function1 to create-review.
Create a folder at the same level of your serverless.yml file and name it createReview.
Grab your index.js file and put it inside the createReview folder.
Rename the index.js file to createReview.js.
On the serverless.yml file change the value of the functions.create-review.handler from index.handler to createReview/createReview.handler. That's the new location of your only AWS Lambda Function handler.
Your file content must look like this:
service: ramzeis-store
frameworkVersion: '3'

provider:
  name: aws
  runtime: nodejs18.x

functions:
  create-review:
    handler: createReview/createReview.handler
Enabling Typescript and installing other necessary modules
Let's get rid of that nasty JavaScript code and start using TypeScript.
Get your package.json file by running npm init.
Install the following node modules as dev dependencies by running npm i -D esbuild typescript serverless-esbuild serverless-iam-roles-per-function serverless-offline
- esbuild
- typescript
- serverless-esbuild
- serverless-iam-roles-per-function
- serverless-offline
Update your serverless.yml file in order to:
- Tell the Serverless Framework that you are going to use the
serverless-esbuildand the other plugins. - Tell the
serverless-esbuildplugin that you want the source code of your functions to be minified and bundled.
The
serverless-iam-roles-per-functionand theserverless-offlineplugins are needed for something different than just make TypeScript work, but we will install it now and talk about it later.
The file must look like this:
service: ramzeis-store
frameworkVersion: '3'

provider:
  name: aws
  runtime: nodejs18.x

# Add this below
plugins:
  - 'serverless-esbuild'
  - 'serverless-offline'
  - 'serverless-iam-roles-per-function'

custom:
  esbuild:
    bundle: true
    minify: true
# Add this above

functions:
  create-review:
    handler: createReview/createReview.handler
Create a tsconfig.json file in order to configure TypeScript as you like, the file could look like something like this:
{
  "compilerOptions": {
    "strict": true,
    "preserveConstEnums": true,
    "strictNullChecks": true,
    "sourceMap": true,
    "allowJs": true,
    "target": "es5",
    "outDir": ".build",
    "moduleResolution": "node",
    "lib": ["es2015"],
    "rootDir": "./"
  }
}
At this point the code of your createReview.js Lambda Function must look like this:
module.exports.handler = async (event) => {
  return {
    statusCode: 200,
    body: JSON.stringify(
      {
        message: 'Go Serverless v3.0! Your function executed successfully!',
        input: event,
      },
      null,
      2
    ),
  };
};
Now, let's rewrite the content of that AWS Lambda Function so it is now TypeScript code and it is ready to receive a POST request. For now let's say that the purpose of this AWS Lambda Function is to create an item on our DynamoDB Table. The item will be a product review, just like when you purchase a product on Amazon and leave a review, well that's what I'm talking about here.
This function will be mapped to the (POST /products/{productId}/reviews) endpoint
import {
  APIGatewayProxyHandler,
  APIGatewayProxyEvent,
  APIGatewayProxyResult,
} from 'aws-lambda';
import * as crypto from 'crypto';

export const handler: APIGatewayProxyHandler = async (
  event: APIGatewayProxyEvent
): Promise<APIGatewayProxyResult> => {
  try {
    const productId = event.pathParameters?.productId;
    const tableName = process.env.DYNAMODB_MAIN_TABLE_NAME;
    const requestBody = JSON.parse(event.body!);

    const item = {
      pk: productId,
      sk: `review|${crypto.randomUUID()}`,
      ...requestBody,
    };

    const command = new PutCommand({
      TableName: tableName,
      Item: item,
    });

    const ddbClient = new DynamoDBClient({
      region: 'us-east-1',
    });

    const ddbDocClient = DynamoDBDocumentClient.from(ddbClient);

    await ddbDocClient.send(command);

    return {
      statusCode: 201,
      body: JSON.stringify({
        msg: 'The Review was created successfully',
      }),
    };
  } catch (error) {
    return {
      statusCode: 500,
      body: JSON.stringify(error),
    };
  }
};
After looking the code there are 3 really important things to keep in mind:
- To create a review the productId of the product to which this review corresponds is needed. That productId will be received as a path parameter by this function.
- In order to put the review item on the table you need the name of the DynamoDB table where the item is going to be inserted. The name of the table on the code above is coming from an environment variable that must be defined on the
serverless.yml - In order to be able to use the PutCommand and put the review item on the DynamoDB table the AWS Lambda Function needs permissions (AWS IAM Role) in order to interact with that particular table.
Configure those last 3 things on the serverless.yml
service: ramzeis-store
frameworkVersion: '3'

# Here you can define parameters that can be used anywhere on your serverless.yml file. If you specify the same parameter for different stages then that parameter will have a different value based on the stage. Here we have the 3 arns for our 3 tables (one per stage).
params:
  dev:
    dynamo-db-main-table-arn: 'arn:aws:dynamodb:us-east-2:444172228005:table/store-dev-main-table'
  stag:
    dynamo-db-main-table-arn: 'arn:aws:dynamodb:us-east-2:444172228005:table/store-stag-main-table'
  prod:
    dynamo-db-main-table-arn: 'arn:aws:dynamodb:us-east-2:444172228005:table/store-prod-main-table'

provider:
  name: aws
  runtime: nodejs18.x
  # Define all of your env variables below in order to use them in your serverless functions code
  environment:
    # Get current stage with ${sls:stage} (dev, stag or prod) and use it on that string. You must have 3 DynamoDB tables created on AWS (one per stage): store-dev-main-table, store-stag-main-table, and store-prod-main-table
    DYNAMODB_MAIN_TABLE_NAME: 'store-${sls:stage}-main-table'

plugins:
  - 'serverless-esbuild'
  - 'serverless-offline'
  - 'serverless-iam-roles-per-function' # This plugin allows giving IAM role statements to each individual function, so the AWS Lambda Function is allowed to

custom:
  esbuild:
    bundle: true
    minify: true

functions:
  create-review:
    handler: createReview/createReview.handler
    # Define the events that will trigger this function.
    events:
      # http is for mapping the AWS Lambda Function to an AWS API Gateway endpoint. This function will be triggered when AWS API Gateway service receives a (POST /products/{productId}/reviews) request
      - http:
          method: POST
          path: '/products/{productId}/reviews'
          request:
            # Define the schema file location used for validating the request body received by this function
            schemas:
              application/json: ${file(createReview/createReview.schema.json)}
            # Define both querystring parameters and path parameters
            parameters:
              paths:
                # For this request we only have 1 path parameter. If value = true then the parameter is required, false for not required
                productId: true
          # Enable cors and define the origins that are able to interact with the your AWS Lambda Function
          cors:
            origins:
              - 'https://example1.com'
              - 'https://example2.com'
              - 'https://example3.com'
    # Define in form of AWS IAM statements the actions that this AWS Lambda Function is allowed to perform on the specified resources
    iamRoleStatements:
      - Effect: Allow
        Action:
          - 'dynamodb:PutItem'
        # Here you are accessing the dynamo-db-main-table-arn parameter value
        Resource: ${param:dynamo-db-main-table-arn}
Define a JSON schema for validating the body of the request.
The Serverless Framework and AWS API Gateway let you specify JSON schemas for validating the request body of the POST requests. Keep in mind that you can only do this for POST requests.
As you've seen on the previous section the schemas.application/json prop value was setted to ${file(createReview/createReview.schema.json)}. That means that we need to create a JSON file with that name on that location:
{
  "$schema": "http://json-schema.org/draft-04/schema#",
  "type": "object",
  "properties": {
    "title": {
      "type": "string",
      "maxLength": 200
    },
    "description": {
      "type": "string",
      "maxLength": 2000
    },
    "score": {
      "type": "number",
      "minimum": 1,
      "maximum": 5
    },
    "date": {
      "type": "string",
      "format": "date-time"
    },
    "images": {
      "type": "array",
      "items": {
        "type": "string"
      },
      "minItems": 1,
      "maxItems": 5
    },
    "reviewerEmail": {
      "type": "string",
      "format": "email"
    }
  },
  "required": ["title", "description", "score", "date", "reviewerEmail"]
}
Now every time they send a request to this endpoint with a request body that does not met the requirements defined by you on the schema AWS API Gateway will respond with an error to the client. This is really helpful since this will reduce the amount of code you need to write within the body of your serverless function. Also this will prevent the invocation of the function, so you will save some money per invocations that are going to return an error anyway.
It's super important to keep in mind that the JSON schema must be a draft-04 JSON schema
Store secrets remotely and use them in your code for free
Go to the Serverless Framework website and sign up for a Serverless Dashboard account.
Once you've created your account, go to the bottom left corner, click on your profile pic and create an organization, let's call it ramzeis!

Now create an application while being on the organization you've just created, let's called ramzeis-store!
Now create a service inside the application you've just created, let's call it ramzeis-store!

Now create as many stages as you have on your serverless.yml file. In our case we have 3: dev, stag and prod, let's create them with the exact same names

Now let's create all of the secrets you need on the dashboard. A secret on the serverless dashboard is just a serverless parameter, just like the ones we've defined on the params section of the serverless.yml file and pulled using ${param:parameter-name} on the last part of the previous section. As you've just read, those parameters can also be pulled from the serverless dashboard to your serverless.yml file and further to your code by assigning them to environment variables.
Those parameters are treated as secrets because they are only injected in your code at deploy time, and they won't even be visible on the AWS Lambda code editor.
Keep in mind that as I said, this secrets are injected at deploy time so you can't just change this values on the dashboard and expect them to change on your already deployed functions. After changing it's value on the dashboard if you want this changes to take effect on the functions then you need to redeploy all of the functions that use this secrets.
If you want to pull secrets at runtime and not deploy time feel free to use the AWS Secrets Manager , but that's not free.
To create the secrets on your dashboard you have 2 options:
- Creating the secrets at a service level (will have the same value for all of the stages)
- Creating the secrets at a stage level (will have different values depending on the stage)
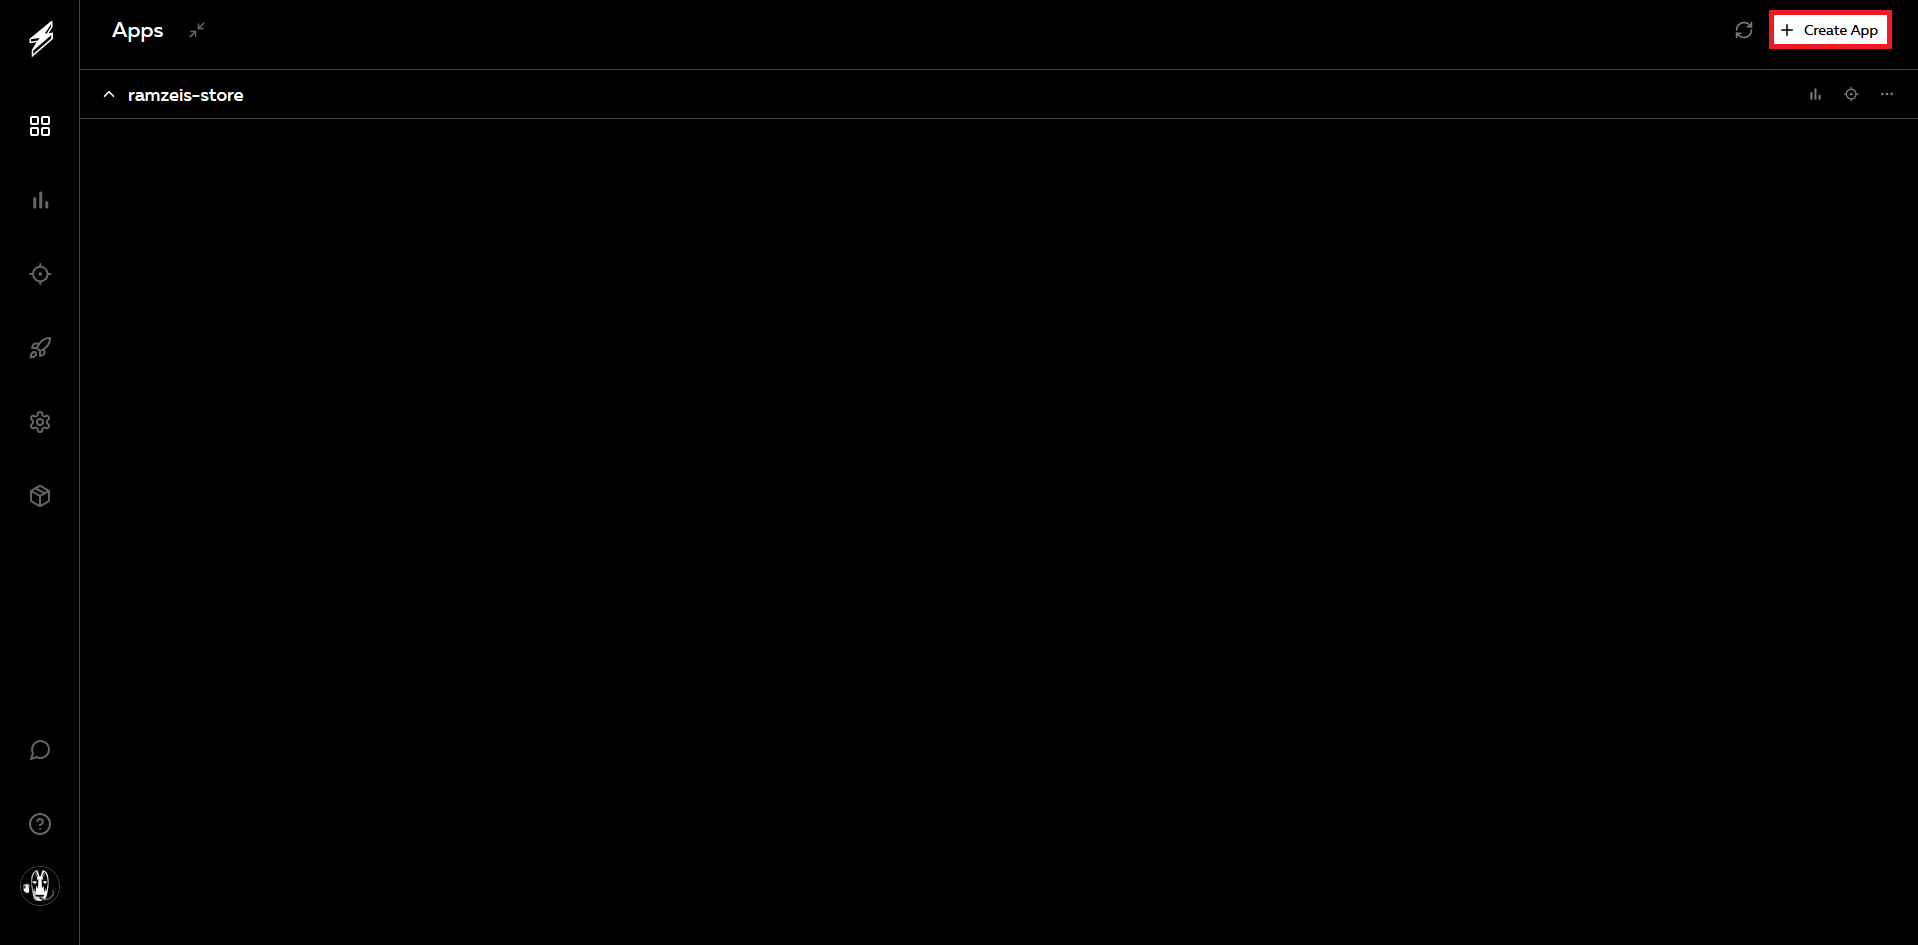
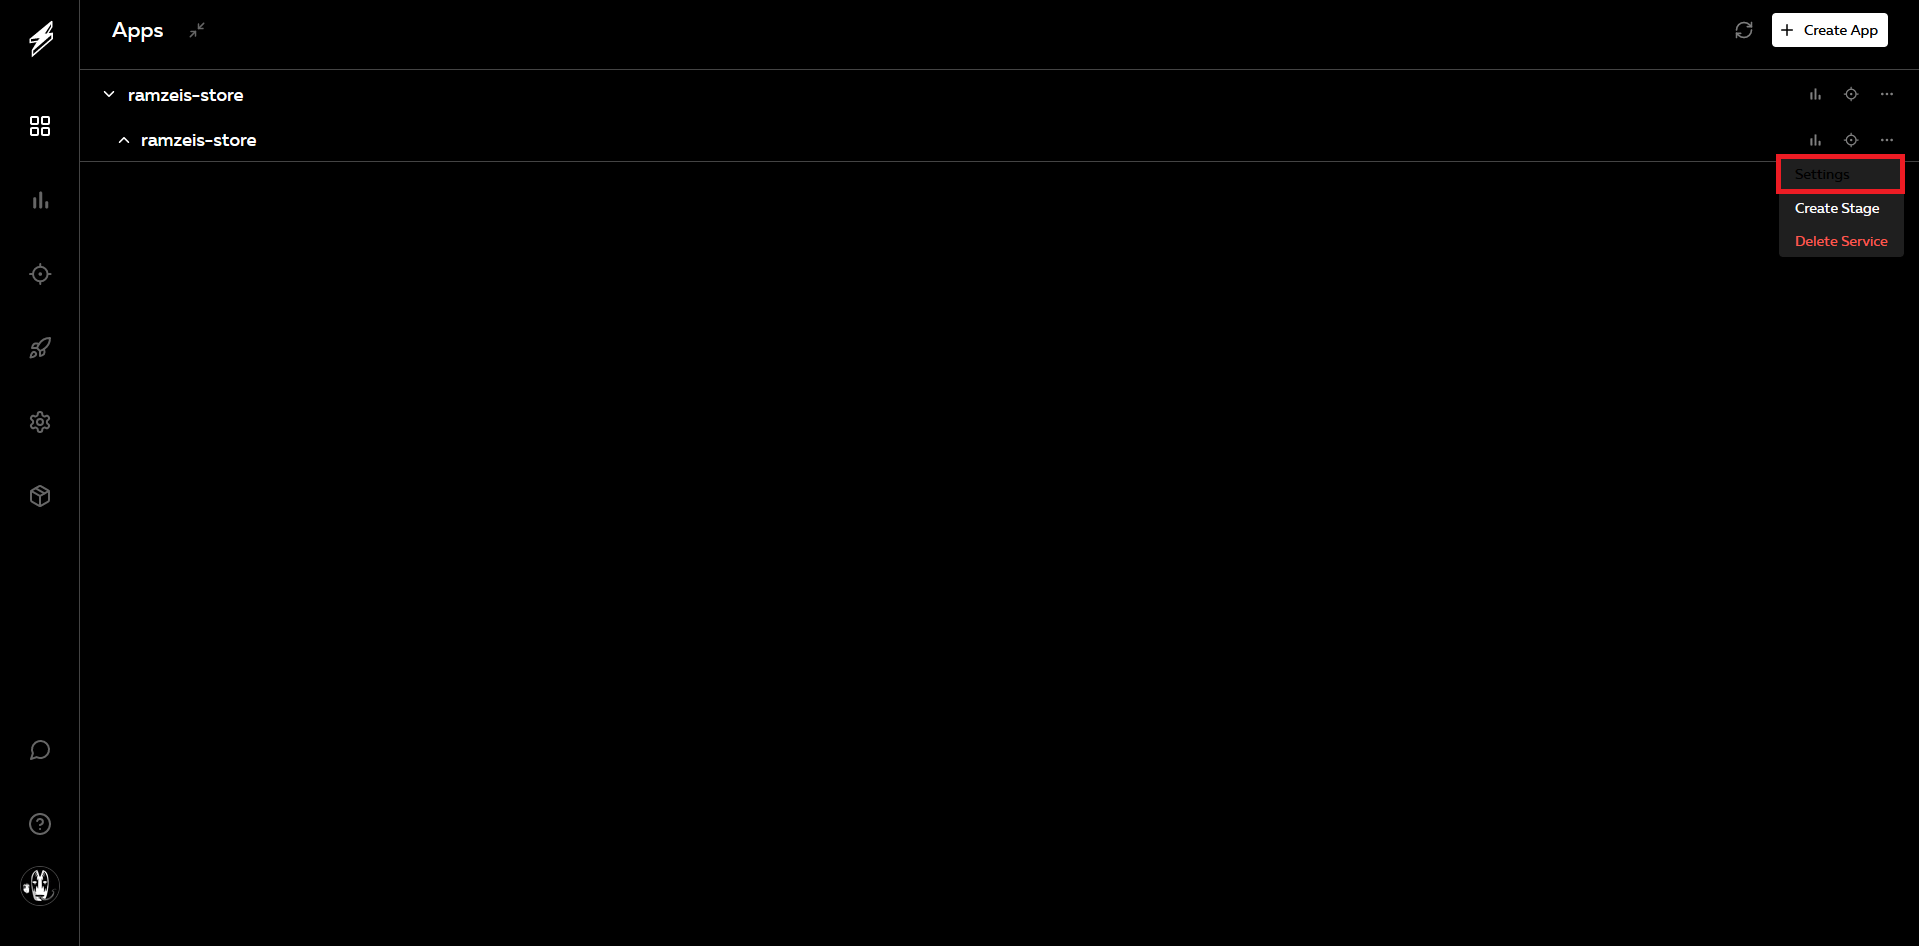
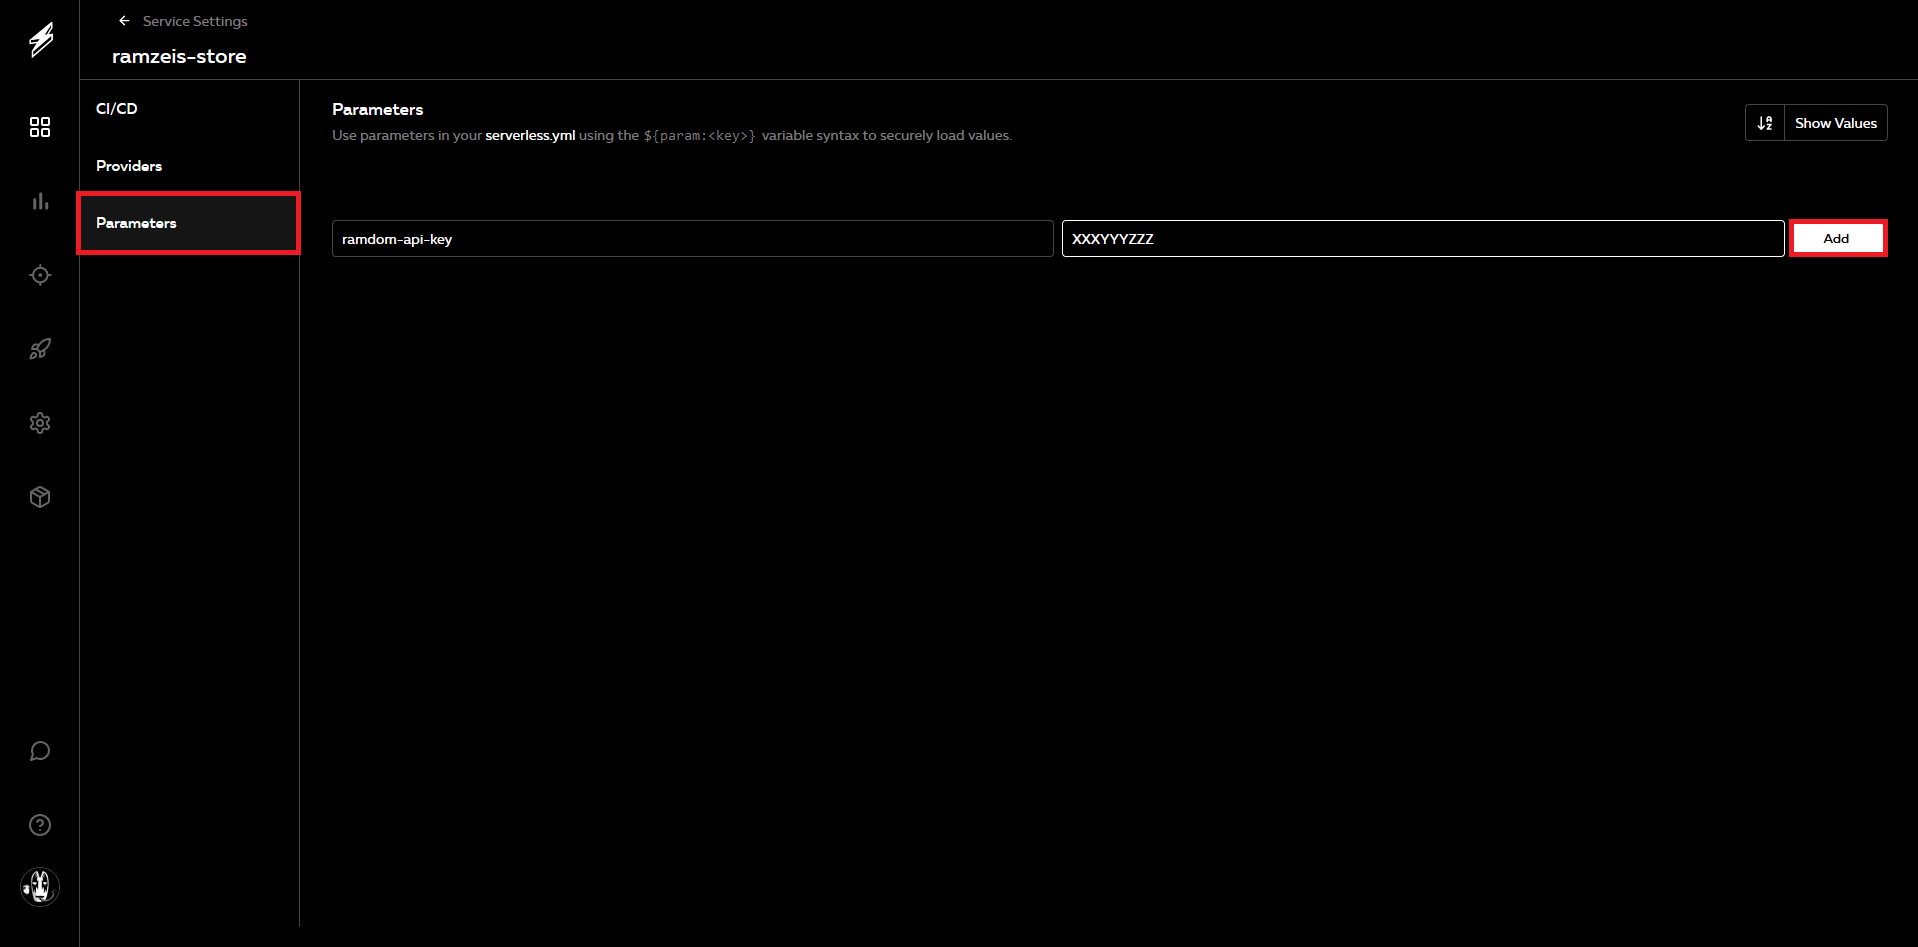
To create secrets at a service level you must go to the service settings
Go to the Parameters tab, and assign a name and a value for the secret. Here we will create the random-api-key secret:
To create secrets at a stage level you must click on the stage where you want to create the secret (not three dots, but the actual stage name), go to the Parameters tab and there you will do the same that was already explained previously. We won't create on this tutorial stage level secrets.
In order to use this secret on your serverless.yml file you must assign it to a env variable:
#...
provider:
  name: aws
  runtime: nodejs18.x
  environment:
    DYNAMODB_MAIN_TABLE_NAME: 'store-${sls:stage}-main-table'
    # Use the exact same name that's on the dashboard
    RANDOM_API_KEY: '${param:random-api-key}'
#...
Once you have defined that env variable on your serverless.yml file go to your AWS Lambda Function code and to access that env variable you just need to use process.env.RANDOM_API_KEY.
Keep in mind that you can only pull secrets and parameters from the Serverless dashboard if you choose the recommended way for deploying. If you deploy in any other way you will need to store your secrets in stores like the AWS Secrets Manager
Deploying your serverless functions and other cloud resources
Before moving further and choosing the deployment method, add the following script commands to your package.json:
{
  "scripts": {
    "deploy-all-dev": "serverless --stage dev deploy",
    "deploy-all-stag": "serverless --stage stag deploy",
    "deploy-all-prod": "serverless --stage prod deploy"
  }
}
This commands will allow you to deploy once you have completed was coming.
The recommended way
First you need to create a provider on your Serverless Dashboard. Click on the three dots on the right of your service and click on settings
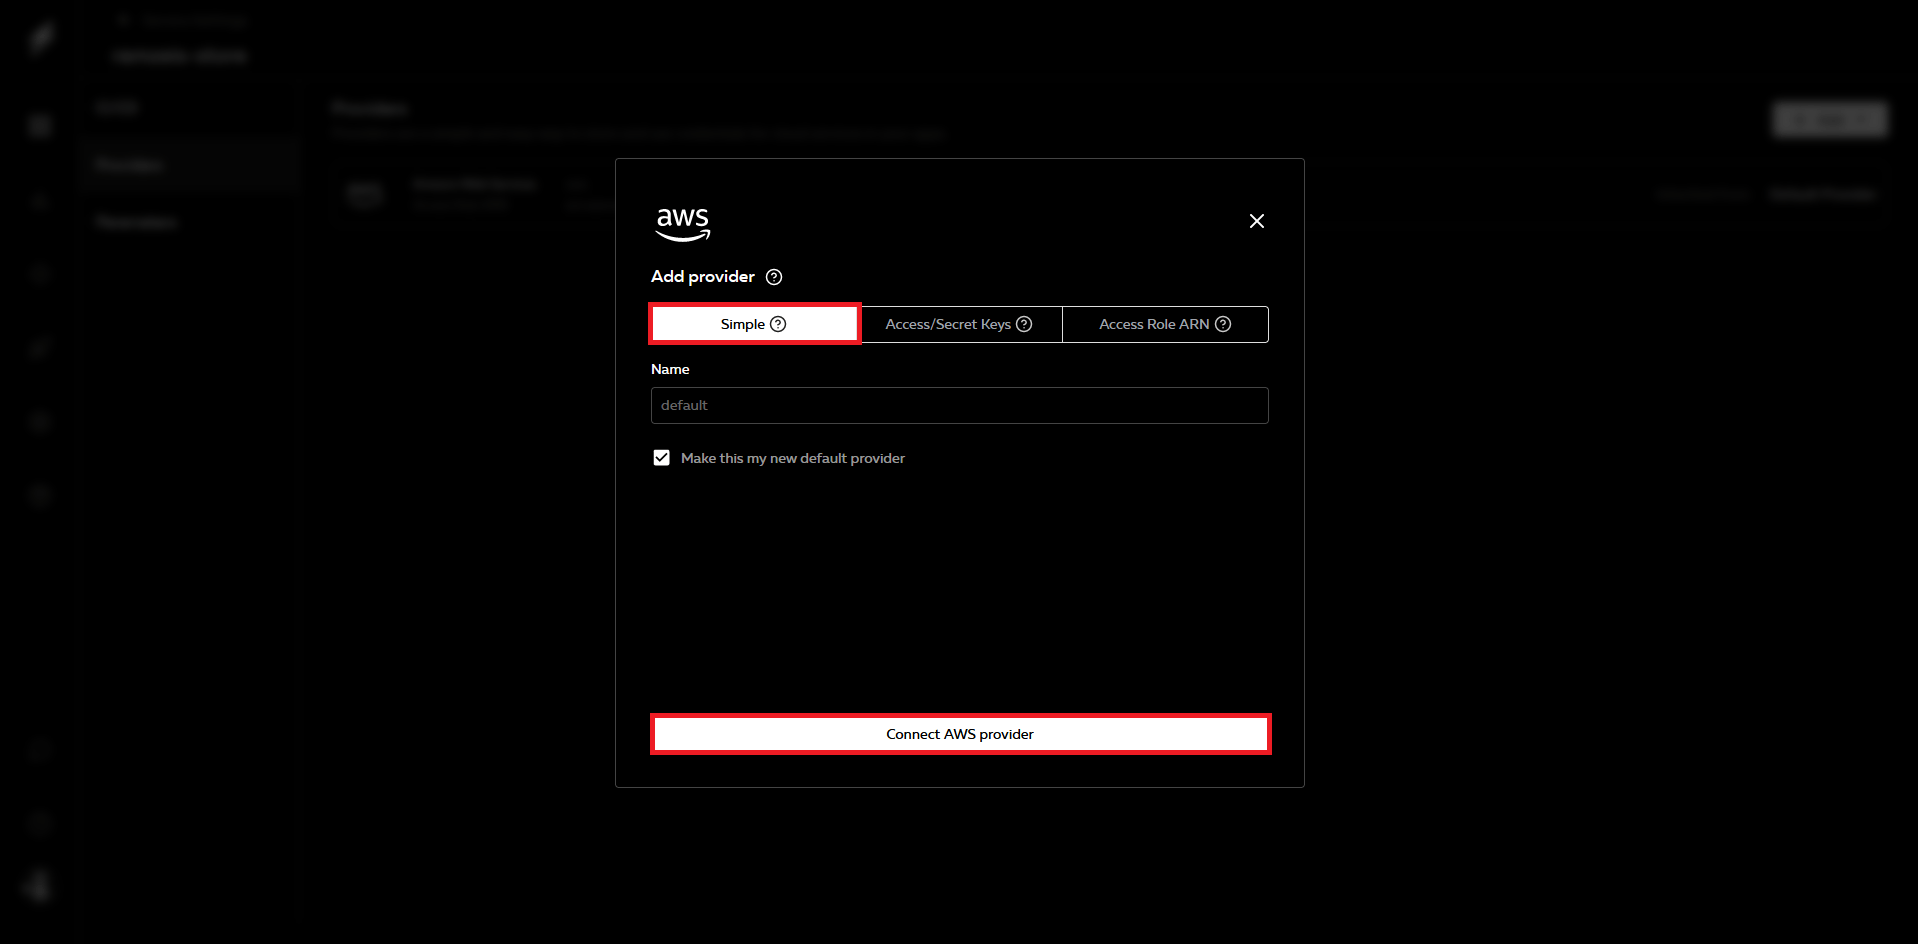
On the Providers tab click on add and choose the simple option, do not specify a name, check the Make this my new default provider box and click on Connect AWS provider
This will prompt you to access your AWS account on the browser and accept the creation of an IAM role that has administrator access. Please accept the creation of this role and you will be ready to go.
Now, go to the serverless.yml and add the organization and the application name to the file, if you don't specify those 2 things you won't be able to deploy this way
#...
org: 'ramzeis'
app: 'ramzeis-store'
service: ramzeis-store
frameworkVersion: '3'
#...
Now, you need to login to your Serverless Dashboard account but from the CLI. Located at the same level of your serverless.yml file open the command line and run serverless login.
After running this command the serverless CLI will open your browser of preference and will ask you to login on the browser. On the browser follow the steps until you login. Once you are logged in a message on the command line will appear highlighting that you have login successfully.
This is the recommended way because you don't need to have stored AWS credentials locally on your machine in order to make this deployment work. The IAM role that was created when you've created the provider on the dashboard will generate new short lived credentials on every deployment automatically and you won't even need to notice it. Also if you choose this way you will have access to the dashboard secrets.
Now you are ready to run npm run deploy-all-dev
The no so good way
This approach consists on using the AWS CLI to set up local long term credentials (aws_access_key_id and aws_secret_access_key) so Serverless is able to use those credential keys in order to deploy your resources to your AWS account when running serverless deploy.
Either create a new user with administrator access (permission to do everything on AWS) or use your root user (not recommended) for generating Long-term credentials. You will need to obtain both an aws_access_key_id and an aws_secret_access_key.
Once you got those 2 keys go to your AWS CLI credentials file and insert a new entry like on the following example (assuming that the user from which you got the credentials is named example-user)
[example-user]
aws_access_key_id=SOMETHING
aws_secret_access_key=SOMETHING
Now go to your AWS cli config file and insert an entry for that same user, but putting the string profile before the name of the user. You also need to specify the region
[profile example-user]
region=us-east-1
If you do not know where to find those credential files keep in mind that the
credentialsandconfigfiles are located at~/.aws/on Linux or macOS, or atC:\Users\USERNAME\.aws\on Windows. If you are not able to find them it may be because you haven't configured any credentials on your machine, so go and look for a tutorial online on how to configure credentials using the AWS CLI.
Before starting a deployment you need to tell the Serverless Framework which profile of the ones you have on your config file is going to be used. Go to the serverless.yml file and add the profile prop with a value of example-user
#...
provider:
  name: aws
  profile: 'example-user'
  runtime: nodejs18.x
  environment:
    DYNAMODB_MAIN_TABLE_NAME: 'store-${sls:stage}-main-table'
#...
Now you are ready to run npm run deploy-all-dev